
GET READY WITH ME - WORK
So instead of putting myself onto video camera like the traditional 'get ready with me' videos, I am doing mine through pictures today.
I am using the my amazing webcam (that's a lie, it's actually pretty terrible..)so please ignore the terrible quality of my photos.
Although the dress-code in my current environment is very casual and allows for things such as thongs, jeans and singlets - I still prefer to go for that 'dressed up/office chic' type of look.
There is just something fun about putting on a pair of heels and a nice office dress for work. It's so feminine and girly.
So to start of - here is my bare face.
No foundation, no mascara, no concealer, nothing!
Say hello to le' naturale me.

This 'nautral' stage is where I would normally do my morning face routine.
If you're interested in knowing that let me know and I'll pop that up for you guys to see :)
But basically it involves cleansing and moisturising using mainly these products below:

After I have cleansed and moisturised - face and body - I'll pop on a small bit of primer. I am currently using NP Set Pre-Foundation Bronzing Primer.
This gives me a little bit of an extra sun glow, and helps prep my face for the products that I am about to apply.
After I have applied my primer, I then apply my Australis Stayput Foundation in the shade Natural Beige.

 |
| Photo above is after application of Australis Stayput Foundation |
After I have applied the foundation, I then like to take a different foundation (for today I am using Maybelline FitMe Foundation) and I apply that in the areas that I feel need a little more coverage. You can see in the photo below I have pointed out where I apply my second coat of foundation
(cheeks and chin)

I like to apply my concealer after I have applied my foundation.
I am currently using Maybelline New York's Age Rewind Double Face Perfecter, which has a highlighter on the other end.
I only apply the concealer in an "L" shape - under my eyes in down the side of my nose.

Once all signs of a sleepless night are erased with my concealer, I apply this next little beauty. Now when you see the photo you're going to be thinking "oh my gosh, V. What on earth is that?"

Well, I introduce to you one of my best little beauty finds.
This is a foundation stick that I have been repurchasing for years.
I don't recall ever doing a review on it, so I must do that for you guys (*mental note!)
This foundation stick is from a brand called Starlet.
This could be completely wrong, so correct me if it is, but I think it is exclusive to Coles? That's where I get mine from.
Anyway, this foundation stick has amazing coverage. I've never used it for an all-over foundation. I usually use it basically like a concealer. But I find it much too heavy to use under the eyes, so I just dab a bit on any blemishes that I can see through my foundation. I am in the shade Natural Tan.
If you happen to see one of these next time you're in Coles, I'd give it a try. Very inexpensive and very handy!
(has anyone tried any of the other Starlet products?)
I then apply a quick sweep over of my Glamourflage Princess Penny Face Powder with my big fluffy brush.

 |
| everyone loves an action shot! :) |
After I applied my powder, I then do a quick sweep of my Sportsgirl Glow and Behold Illuminating Bronzer, just for a bit of a nice glow.
I apply this in a quick upwards sweeping motion on my cheek bones and I only use the slightest amount. I also apply a small bit across the forehead and down my nose. I prefer this than an actual bronzer because it has a really nice color to it, and sometimes I find bronzer to be a little overpowering on my skin. This product gives a gorgeous subtle glow.

 |
| I apply the bronzer using the same fluffy brush from my powder application |
I then apply a small amount of blush. For today I am using my Hello Kitty Blush in the shade Venise.
My regular blush is usually my Mirenesse Cheeky Blush. But since I did a review on it the other day I have misplaced it :(
But I still love the Hello Kitty Blush. It's a really pretty color.
I don't apply my blush on the apples of my cheeks. I prefer the way it looks on me when I apply it in an upwards motion, starting from the apples and up towards my hairline just under the cheekbone.

 |
| I use a smaller brush for my blush application (say that three times fast!) |
Once I have my rosy cheeks sorted I apply some highlighter.
I wasn't much of a fan of the highlighter that formed part of my Maybelline New York Age Rewind Double Face Perfecter. I felt it didn't really give me the sun kissed glow that I was looking for.
I prefer to use my All About Glo Illuminous Glow cream.
I don't know if you can still pick this product up, it may be discontinued now.
But check your local Target next time you're in there.
I picked mine up from there a long time ago. But you can use any highlighter you like for this stage.
I apply three dots across my cheekbones and blend in a sweeping motion.
I also apply a tiny amount down the bridge of my nose, and a small amount on my cupids bow.


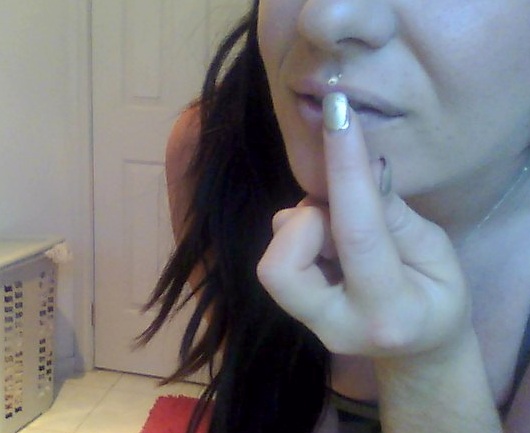
 |
| Can you notice the sun kissed glow on my cheekbone? |
Now we are coming into the final steps (and my favourite part!), the eyes.
The first coat of mascara that I apply is my Rimmel Telescopic Clean Definition mascara.

 |
| You can see the difference in my lashes after I have applied a coat to my right eye lashes. |
I then repeat the process using my Maybelline Falsies mascara in blackest black. I mainly focus this mascara application on the other lashes of my eyes. I then go ahead and do the other eye.


Once both eyes are done, I like to use the same process on my bottom lashes.

The very last step is my eyebrows.
My eyebrows are quite dark naturally, so I can get away with a quick fill-in using a black eyeshadow.
I use the black from my cheap, no-brand eyeshadow pallet and using a small brush I give it a quick sweep over. My eyebrows are already quite full, so I don't really need to spend much time at all on them,


And we're done!
(it seems like so much, when you step out the process in photos...)
But the whole process takes me under 30 minutes, depending on how preoccupied I get.


How long does it take you to get ready in the morning?
Comment below!

Votrebelle
xx
From woe to go I can be ready in 30 minutes (inc shower) - that said I don't blowdry my hair everyday or anything. Makeup usually takes 15 minutes for day-to-day stuff
ReplyDeleteFrom waking up, I'll be ready for work in about 30 minutes. I wash, dry and straighten my hair at night so I don't need to do it in the morning.
ReplyDeleteMy quick run through is washing, toning and moisturising my face, including eye cream. Primer, foundation, under eye concealer, face concealer, powder, translucent powder, eye primer, lid eyeshadow, crease eyeshadow, outer corner eyeshadow, liquid liner, pencil liner on my waterline, lash primer, mascara, blush, highlighter. Run a straightener through my hair, back comb it at the roots, add slight curls around my face. Get dressed (pre-planned outfit the night before), perfume, throw my phone in my bag and leave. Grab coffee and breakfast on the way to work, apply lipstick while I'm waiting. Done.
I've got it down to a speedy process.
Forgot to add eyebrow pencil and gel lol
ReplyDelete